

How to Set Up a Shopify Store in 10 Steps

Shopify is my top-rated e-commerce platform, not just based on my own evaluation but also backed by strong reviews from real-world users and industry experts. If you’re ready to start selling online but aren’t sure where to begin, I can confidently say that Shopify makes the process incredibly straightforward, even if you have zero technical experience.
In this step-by-step guide, I’ll walk you through exactly how to create a Shopify store, from picking a theme and adding products to setting up payments and getting your store ready to launch.
Step 1: Sign up for Shopify
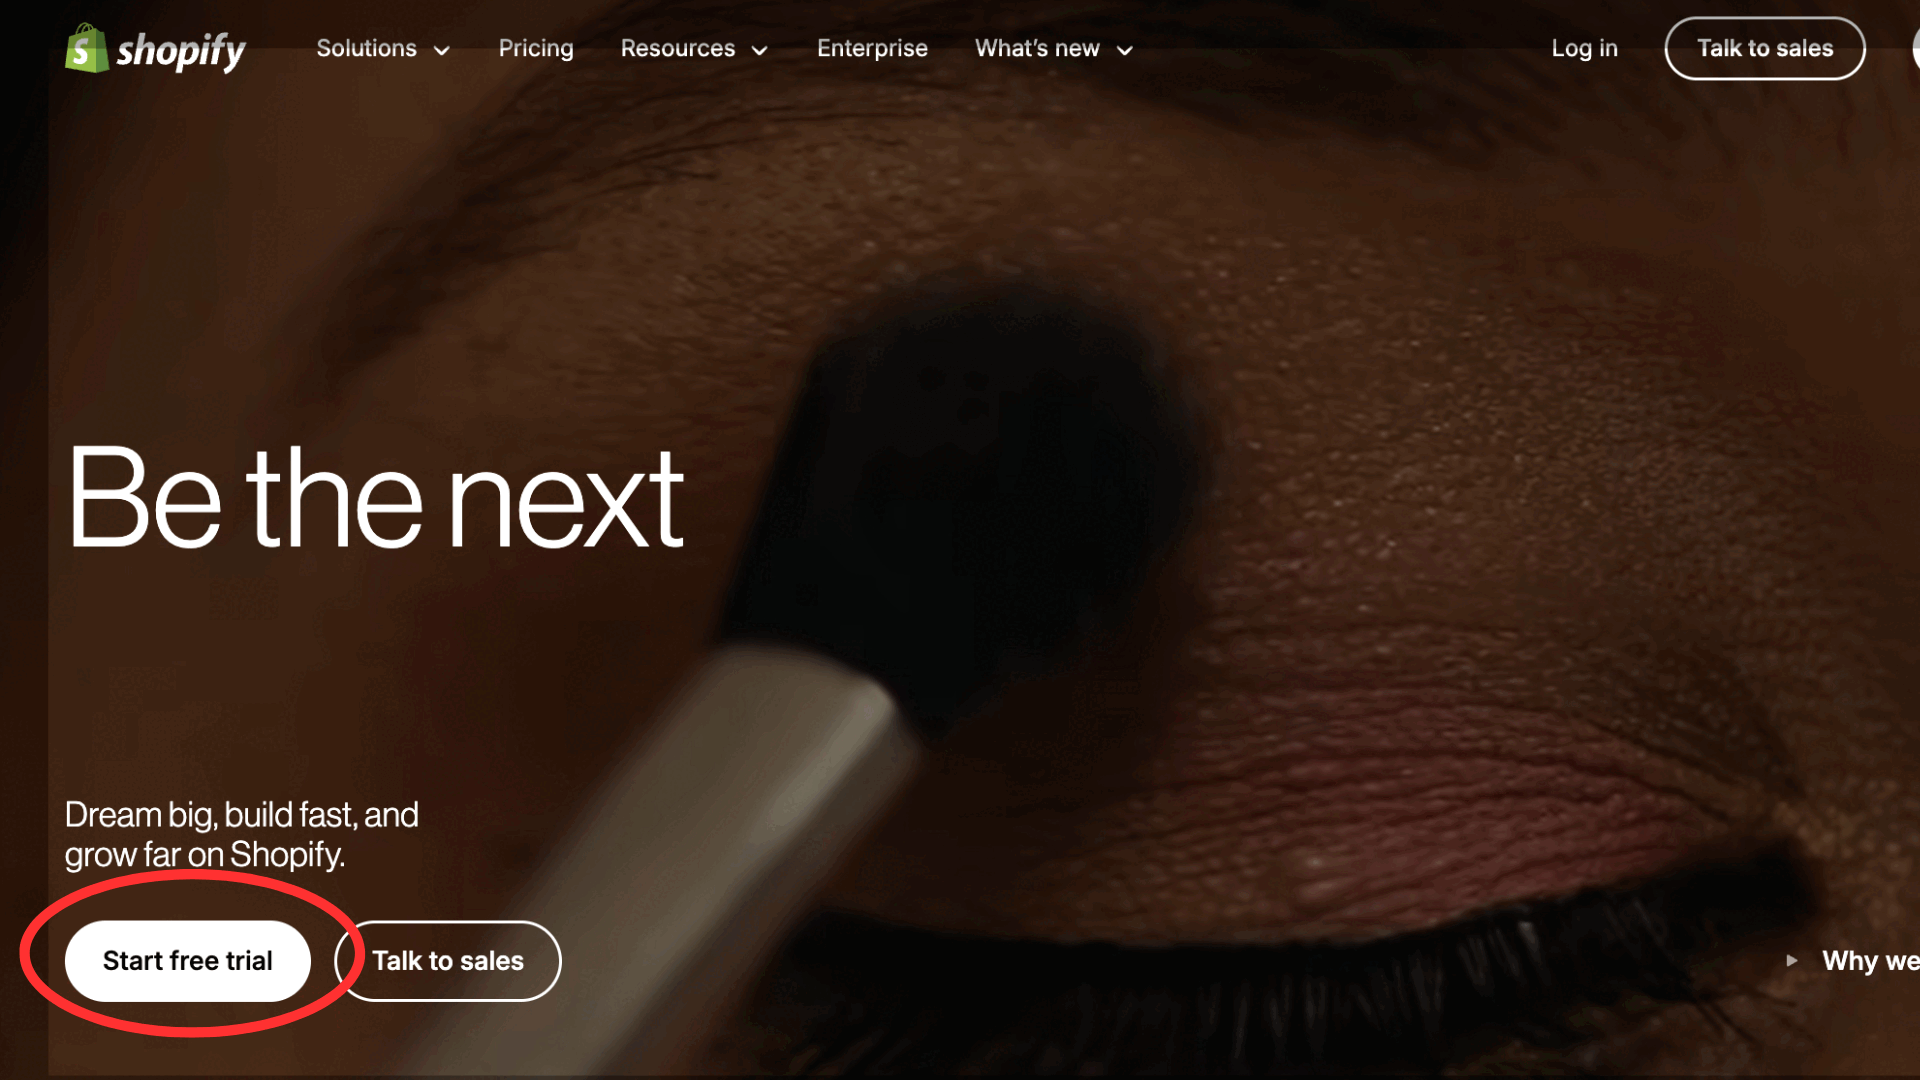
Start by heading to Shopify.com and clicking on Start free trial. Shopify offers a three-day free trial and a $1/month deal for the first three months on select plans. I personally find it great for testing the waters without a big commitment. You need at least that amount of time to see if the platform is a good fit for what your e-commerce business needs.
Once you click on the Start free trial button, you’ll need to enter your email address and select a password. You can also choose to answer a few short questions about your business or skip that altogether. Additionally, you’ll be prompted to sign up for a plan — you don’t need to pay for the $1/month deal right now. You will receive an email to sign up before your three-day free trial ends.
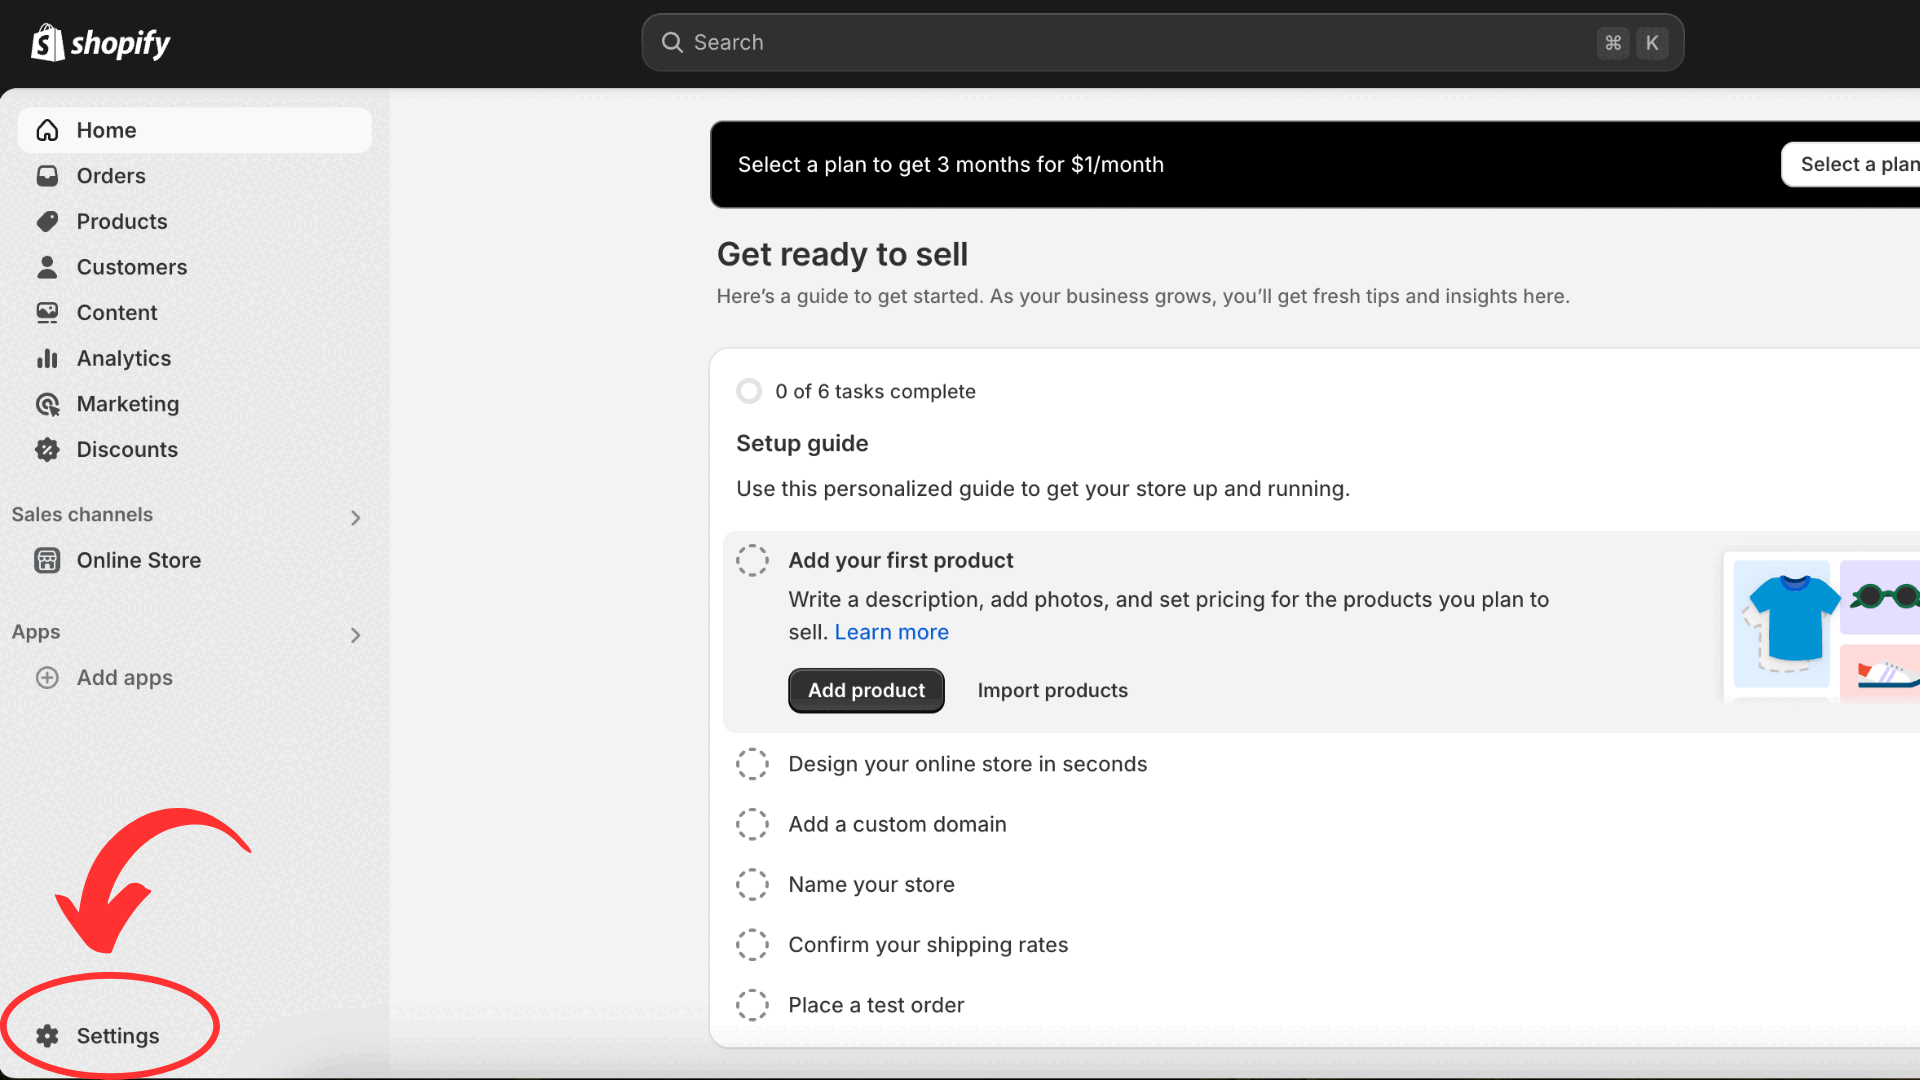
The sign-up process ends with a setup guide. This will show in your Shopify dashboard until all the steps are completed.
💡 Tip: Don’t overthink the store name right now — you can change it later. Focus on getting inside the Shopify dashboard, where the real setup happens.
Step 2: Set up your store’s details
Once you’re inside the Shopify admin (your backend dashboard), go to Settings > General. This is where you’ll enter important information like your store details and defaults. Enter your billing address and set up your time zone, default currency, and weight unit.
The default currency is the currency in which your prices will be listed (like USD, EUR, or GBP). Make sure this matches your primary customer base.
💡 Tip: If you’re selling B2B, Shopify Plus allows you to customize pricing by customer group and offer wholesale discounts automatically.
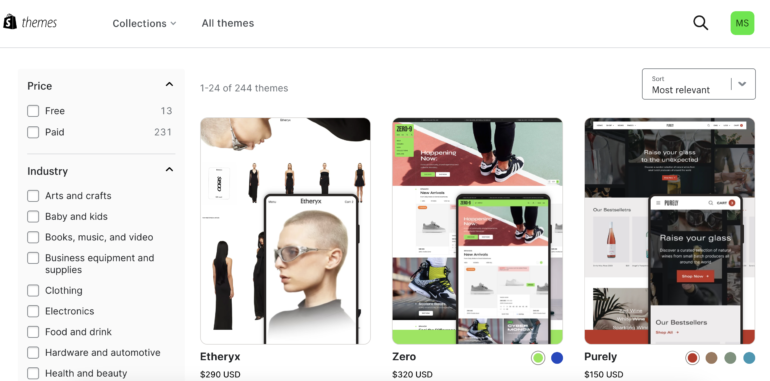
Step 3: Choose and customize a theme
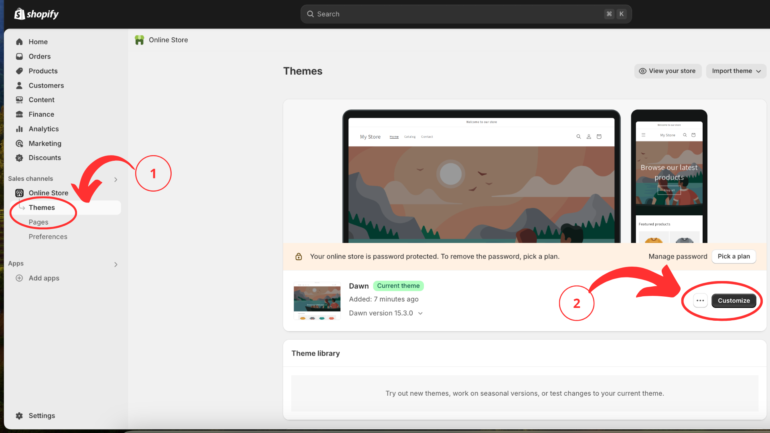
Now comes the fun part — designing your store. Head to Online Store > Themes, where you’ll find free and paid themes. A theme controls how your store looks: layout, fonts, colors, etc. Think of it as the place where you set up your website.
Once you see the page for Themes, click Customize on your theme to tweak the homepage, add your logo, or change the color scheme to match your brand. You can see where to click in the image below.
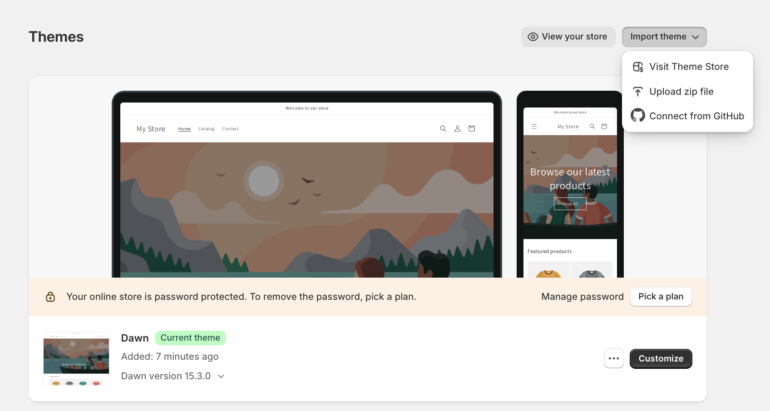
Choose a simple theme to start — Debut or Dawn are great free options. You can always change or upgrade it later. If you want to explore the available themes, click on Import Theme > Visit Theme Store.
What’s great about Shopify’s themes is that they are all mobile-first, meaning they’ll look good on phones and tablets, too. Mobile-first website templates are crucial for your online store. The majority of shoppers now browse and buy directly from their phones. Mobile-first templates ensure your site loads quickly, looks clean, and functions smoothly on smaller screens — enhancing user experience and boosting conversions. Plus, search engines like Google prioritize mobile-friendly sites, so it can help your store rank higher in search results.
Once you choose a theme, you can take it a step further by customizing it to your brand. To do that, follow these steps:
- Open the Theme Editor: Go to Online Store > Themes in your Shopify admin. Click Customize next to your active theme.
- Edit sections and blocks: Add, remove, or rearrange sections and blocks for each page. Click a section name in the sidebar to adjust its content and settings.
- Use theme settings: Change colors, fonts, and layout styles from the Theme settings tab.
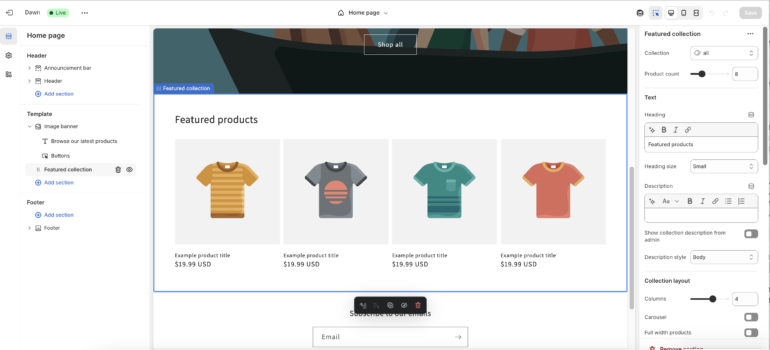
Alternatively, you can click the three dots next to your theme and select Edit code if you need advanced changes not available in the editor and know how to code.
Don’t forget to click Preview to see your changes live. Hit Save to apply your updates.
Step 4: Add products
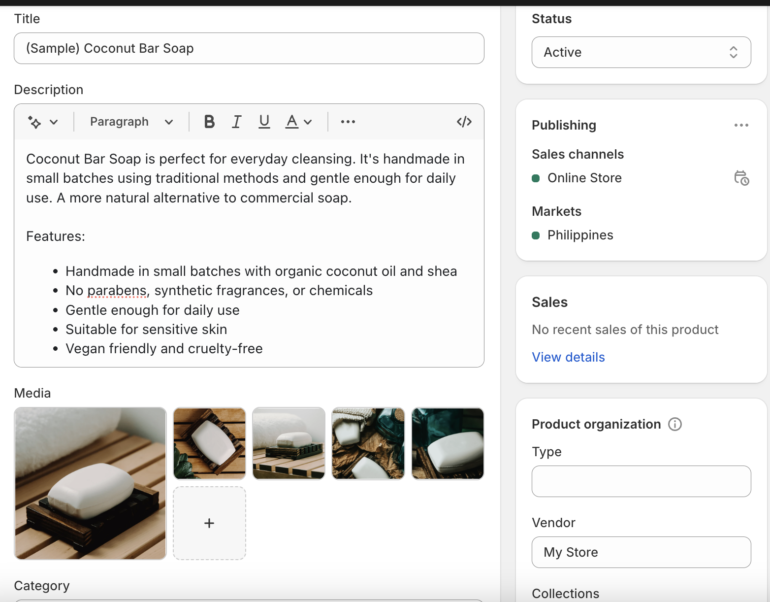
Now that your storefront design is dialed in, it’s time to stock the shelves. You’ll add product listings from your Shopify admin or mobile app — whichever works best for you.
- From your Shopify admin: Click Products, then Add product. Fill in your product title, description, pricing, images, and more. Click Save to publish it to your store.
- From the Shopify mobile app: Tap Products in the Shopify app. Tap the + icon, then Add product. Enter details and tap Save.
- Bulk upload option: Use a CSV file to import multiple products at once — ideal for large catalogs or moving from another platform.
Each product in Shopify gets its own product details page — this is where your customer decides to buy. This is the core of your product presentation. Keep it clear, compelling, and helpful to guide your customer to checkout.
- Title and description
- Media gallery (images, videos, or 3D models)
- Price, compare-at price, and any available discounts
- Inventory details, including SKU and barcode
- Variants like sizes or colors
- Shipping and weight info
- Metafields for custom content
- Search engine listing preview to edit SEO metadata
To help you create quality and sales-converting product listings, here are a few tips:
- Write strong, unique product descriptions: Avoid manufacturer copy. Use bullet points, rich text formatting, and keywords to help with SEO.
- Upload high-quality media: Crisp photos or short videos help build buyer confidence. Ensure images look great on both desktop and mobile.
- Set clear prices and inventory: Add base prices, use compare-at price for discounts, and track stock quantities accurately.
- Group with collections and tags: Use collections (e.g., “Best Sellers” or “Summer Favorites”) for navigation and tags for filtering and search.
- Use metafields for extra info: Add custom content like ingredient lists or care instructions and connect it to your theme.
- Edit SEO settings: Scroll down to the search engine listing preview and tweak the title and meta description to improve visibility on Google.
If you are struggling with producing product copy, Shopify has a built-in AI generator called Shopify Magic that can create product descriptions from the prompts or keywords you supply. You can also specify the tone you want for it.

Your product pages are where decisions happen, so this step is worth the time. Once you’ve added a few listings, we’ll move on to setting up payments.
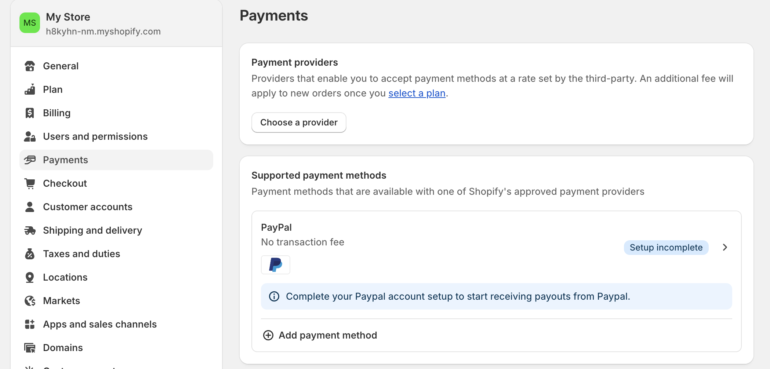
Step 5: Set up your payment gateway
Once your products are live, you’ll want to get paid — this is where setting up a payment gateway comes in. A payment gateway is the service that securely processes credit cards, digital wallets, and other forms of payment for your store.
Here’s how to do it:
- Access payment settings: Go to Settings > Payments in your Shopify admin.
- Choose your payment provider: Click Choose a provider. Select from the list of available providers (you can filter by country, e.g., United States). Shopify Payments is usually the easiest option. If it is available in your selling country, it lets you manage everything from one dashboard and avoids extra transaction fees.
- Set up your provider: Enter your account credentials for your chosen payment gateway (like PayPal or Stripe).
Follow any additional steps or verifications required by the provider. - Activate and save: Click Activate once setup is complete. Don’t forget to hit Save to confirm your changes.
I recommend going with Shopify Payments as a payment gateway when you are selling online using the platform, for the following reasons:
- No extra transaction fees: You won’t pay Shopify’s standard commission fee on each transaction if you use Shopify Payments. However, if you use a third-party gateway, Shopify charges an additional 0.5% to 2% per sale on top of what your provider charges.
- Flat, predictable pricing: Shopify Payments has simple flat-rate fees (starting at 2.9% + 30¢ per transaction on the Basic plan), with no monthly or setup costs beyond your Shopify subscription.
- Built right into your dashboard: Everything — orders, payouts, chargebacks — is managed inside your Shopify admin. No jumping between platforms.
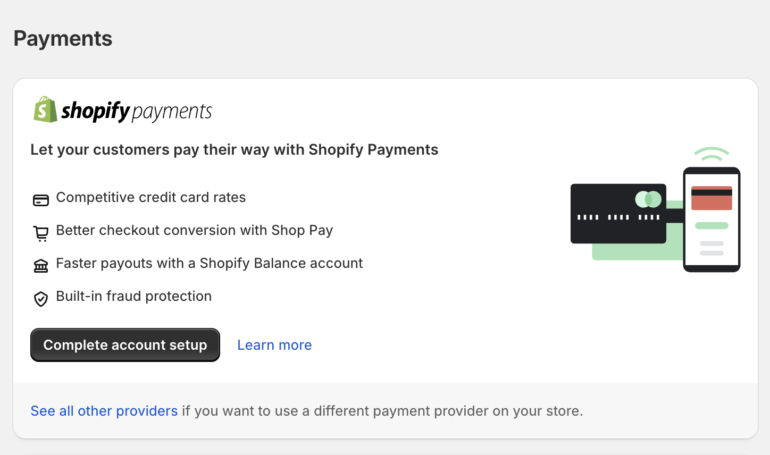
Shopify Payments is ideal for small businesses because it’s integrated, affordable, and made specifically for Shopify sellers. However, if it’s not available in your country, connecting a reliable third-party provider is still an easy and secure option.
Next up: let’s talk shipping so your products can get where they need to go.
Related reads:
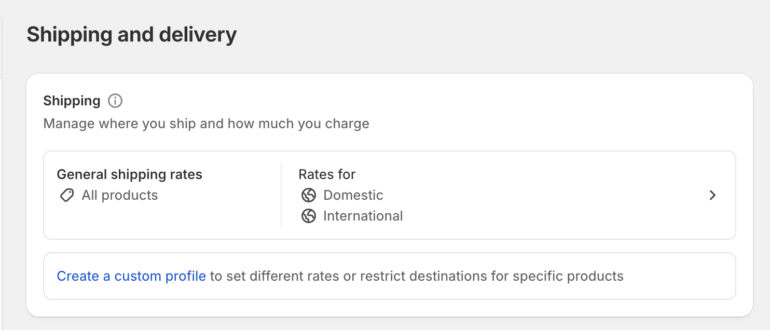
Step 6: Configure your shipping settings
Once payments are in place, the next piece is getting products to your customers. Shopify lets you create custom shipping rules based on location, price, or product weight, and you can offer everything from free shipping to real-time carrier rates.

Here’s how to get your shipping setup dialed in:
- Go to Settings > Shipping and delivery in your Shopify admin.
- Click Manage rates next to an existing shipping profile — or create a new one.
- You can build a general profile for most products or a custom profile for items with special shipping needs.
Set up shipping zones:
- Click Create zone, name it, and select the countries or regions it applies to.
- For example, you might create zones for “U.S. only,” “Asia,” or “Local delivery.”
Add your shipping rates: For each shipping zone, click Add rate and choose how you want to charge:
- Flat rates: A fixed fee for any order (e.g., $5 standard shipping); this is best for simplicity and cost control.
- General rates: Offer different delivery speeds (e.g., $5 standard, $15 express). Both options show up at checkout for the customer to choose.
- Price-based rates: Charge based on cart total (e.g., $4 under $50, free over $100). This option is great for incentivizing larger orders.
- Weight-based rates: Use product weights to calculate shipping (e.g., $7 under 5kg, $15 over 5kg). This rate option is perfect for physical goods where weight affects cost.
- Free shipping: Set any rate to $0 to offer free shipping. I recommend combining this with a price-based rule to offer free shipping on orders over a certain amount.

If you’re on Shopify’s Advanced or Plus plan, you can enable real-time carrier rates and connect to services like Canada Post, FedEx, or USPS. Rates adjust dynamically based on item weight, box size, delivery speed, and location, which can be very useful if you want to pass on exact shipping costs to the customer. You can also add shipping rate apps from the Shopify App Store if you need more advanced logic or regional providers.
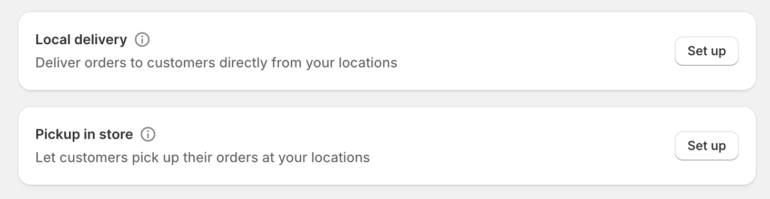
Offer local delivery or pickup:
- Local delivery: Set up delivery by postal code or distance radius, with optional delivery fees and order minimums.
- In-store pickup: Let customers pick up their orders to save on shipping — and you control the pickup experience.
Shipping is often the final decision point before purchase—get it right, and you’ll reduce cart abandonment. Now let’s get your domain name connected so you can make your Shopify store feel truly yours.
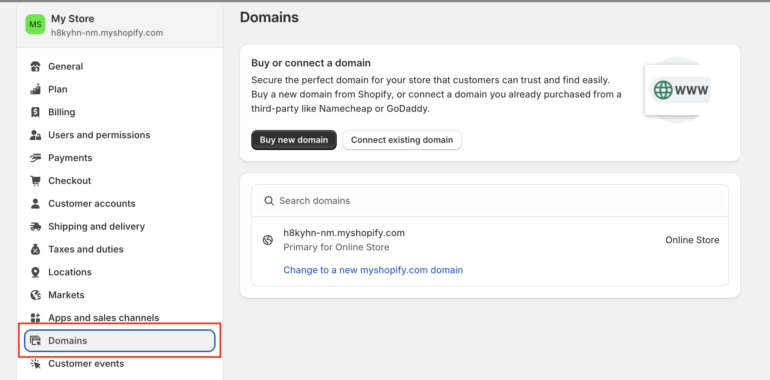
Step 7: Set up your domain
Your Shopify store comes with a default URL ending in .myshopify.com but to look professional, credible, and build trust with your customers, you’ll want your own branded domain (like www.yourstorename.com). What’s great is that Shopify makes it easy to either buy a new domain or connect one you already own.
Here are the options to set up a domain with Shopify:
Option 1: Buy a new domain through Shopify.
This is the easiest option because everything is handled for you. In your Shopify admin, go to Settings > Domains. Click Buy new domain and search for your desired name. If it’s available, follow the prompts to complete the purchase.
Once bought, Shopify automatically sets it as your primary domain (the one customers will see in their browser). You’ll manage everything — renewals, settings, and redirects — from inside Shopify.
Option 2: Connect an existing domain.
If you already have a domain from a provider like GoDaddy, Namecheap, or Google Domains, go to Settings > Domains and click Connect existing domain. Enter your domain (e.g., yourstorename.com) and click Next. You’ll see the following DNS instructions:
- Point the A Record to Shopify’s IP: 23.227.38.65.
- Point the CNAME Record (for the “www” version) to: shops.myshopify.com.
Log into your domain provider and update those DNS settings. Return to Shopify and verify your connection — it may take up to 48 hours to fully connect.
Option 3: Transfer your domain to Shopify (optional).
If you’d rather manage your entire domain — billing, renewals, settings — right from Shopify, you can transfer your domain. This option is ideal if you’re tired of juggling logins across different platforms.
You can add up to 20 domains or subdomains (or 1,000 if you’re on Shopify Plus). You can also add subdomains (like shop.yourbrand.com) to use for campaigns or alternate storefronts. Even if you buy multiple domains (like .com, .co, or .store), you can have them all redirect to your main domain. This keeps your brand protected and your visitors landing in the right place.
Once your domain is set and pointing to your store, you’re almost ready to launch! Next, let’s walk through how to prep your site for its big debut.
Step 8: Launch your store
You’re almost there! With your products, payments, shipping, and domain set up, it’s time to launch your Shopify store. But before opening your digital doors, let’s make sure everything is running smoothly with a few final checks.
Test your store:
Before removing password protection, simulate a few customer experiences:
Go to Settings > Payments > Shopify Payments > Edit and enable test mode.
- Place test orders to verify that the checkout process, payment settings, and shipping options work correctly.
- Use Shopify Payments test mode to simulate both successful and failed transactions (no charges apply).
- If you’re using another payment provider, use Shopify’s Bogus Gateway, or place a real order and refund it immediately.
- Check inventory updates, order fulfillment flow, and tax calculations.
Don’t forget to turn it off when you’re done!
Do a last configuration check:
- Confirm your shipping rates, tax settings, and payment gateways are all active.
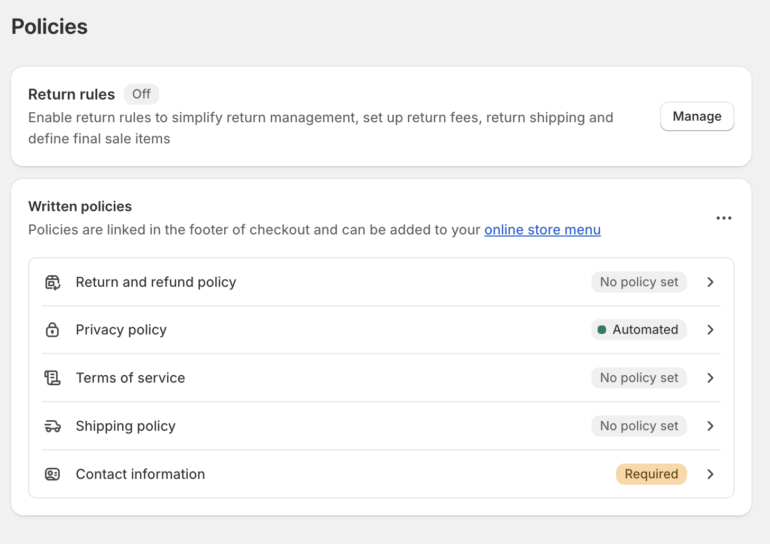
- Make sure you’ve added essential store policies (refund, privacy, terms of service). Shopify has built-in templates under Settings > Policies.
- Review your storefront from a customer’s perspective using the preview tool: Go to Online Store and click the eye icon next to your theme.
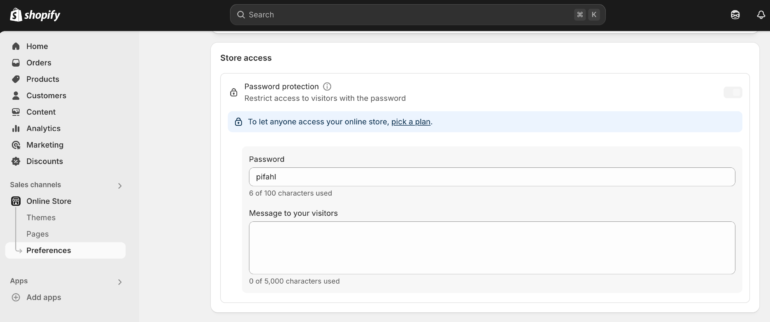
Remove password protection:
By default, Shopify stores are password-protected during setup. When you’re ready for the public, go to Online Store > Preferences. Scroll to Password protection. Uncheck Restrict access to visitors with the password. Click Save.
Once you remove the password, your store is officially live and open for business. Next, let’s dive into promoting your store and bringing in those first customers.
Step: Promote your store
Once your Shopify store is live, it’s time to shift gears — from building to promoting. Luckily, you don’t need to be a marketing expert to start getting traffic. Shopify includes built-in tools to help you grow your audience, automate your campaigns, and stay connected with customers — all from your dashboard.
Here’s how to get started with Shopify’s built-in marketing tools and more:

Use Shopify’s native marketing automation tools
Everything you need to run effective email marketing is already in Shopify:
- Shopify Email: Design branded emails and send campaigns or automated follow-ups like welcome messages and abandoned cart reminders.
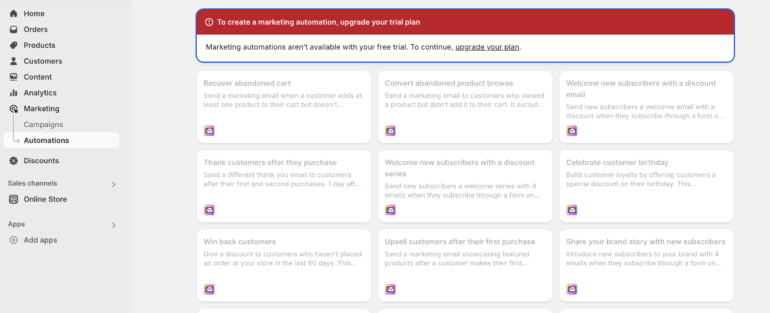
- Marketing automations: Trigger personalized emails based on customer behavior, such as first-time purchases or product views.
- Shopify Forms: Add pop-ups or embedded forms to collect email subscribers or wholesale inquiries. You can even offer a discount code to encourage signups.
- Customer segments: Create dynamic groups — like local shoppers or high spenders —and send targeted emails just for them.
All of these tools work together, so you can build full email funnels without leaving your Shopify admin. Shopify handles analytics, too, so you can track open rates, clicks, and sales tied to your emails right inside the Marketing dashboard.
Engage through social media
Social media is where your brand personality shines. Here’s how to make the most of it:
- Link your Facebook, Instagram, or TikTok accounts using Shopify’s built-in integrations.
- Share products directly from your admin and sync your catalog to social platforms for shoppable posts.
- Try Instagram or Facebook Live to showcase products in real time and answer customer questions.
- Use Shopify Collabs to connect with influencers, share discount codes, and track affiliate sales.
Optimize for SEO
Make sure your store can be found in search engines:
- Use clear, keyword-rich titles and descriptions for products and collections.
- Edit the search engine listing preview to write custom meta descriptions for Google.
- Submit your sitemap to Google Search Console to get indexed faster.
Build and grow your email list
If you’re just starting out, email might become your most cost-effective sales channel. Use Shopify Forms to collect emails on-site. Offer incentives like free shipping or a discount in exchange for signups. Send regular newsletters, promos, and new arrival alerts through Shopify Email.
Run targeted ads and track results
If you’re ready to invest in ads, Shopify makes that easier too: Use the Marketing tab to set up Google Ads, Facebook Ads, or email campaigns.
Stores on Shopify Plus can use Shopify Audiences to create custom buyer lists and export them to ad platforms like Facebook for laser-targeted campaigns.
Run seasonal campaigns and flash sales
Shopify also helps you plan high-impact sales:
- Schedule seasonal or holiday promotions with custom discount codes.
- Prepare for large traffic spikes during flash sales by simplifying product pages and disabling non-essential apps.
- Create a branded password page as a backup if you need to pause traffic due to issues during a major event.
💡 Tip: If you’re not sure where to start, use the Marketing > Campaigns tab to try Shopify’s pre-built templates for promotions, emails, and ads. No coding or design skills required.
Promotion is not a one-time thing; it’s an ongoing process of connecting with your customers and growing your brand. Next, let’s look at how to track your store’s performance and optimize over time.
Step 10: Monitor and optimize your performance
Launching your store is just the beginning. You need to take the time to track what’s working, what’s not, and where to improve. Shopify includes powerful analytics and performance tools built right into your dashboard so you can make smart decisions and grow confidently over time.
Here’s how to keep an eye on your store’s performance:
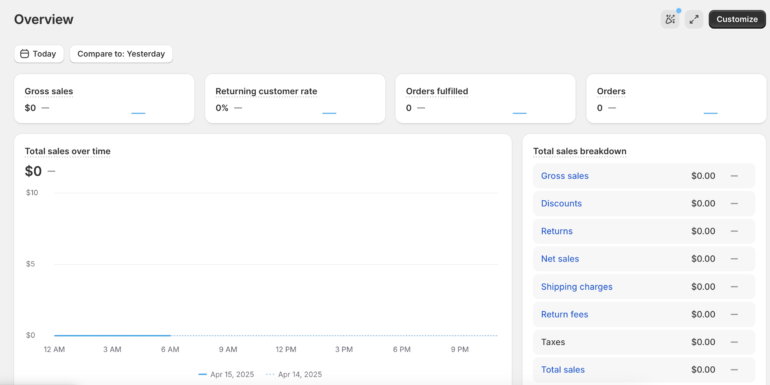
Use Shopify Analytics
From your Shopify admin, you can access real-time and historical reports that track:
- Sales by product so you can identify bestsellers and underperformers
- Traffic sources to understand where your visitors are coming from (e.g., Google, email, Instagram)
- Abandoned carts to see how many customers didn’t complete checkout — and follow up with recovery emails
- Customer behaviors like page views, device types, and conversion paths
These insights help you fine-tune your marketing strategy, update product listings, and improve the overall shopping experience.
Check your Web Performance dashboard
Shopify’s Web Performance dashboard evaluates your store’s speed and stability using metrics based on Google’s Core Web Vitals. You’ll see:
- Loading time (how fast your pages appear)
- Interactivity (how quickly your site responds to clicks and actions)
- Visual stability (how smoothly content loads without shifting).
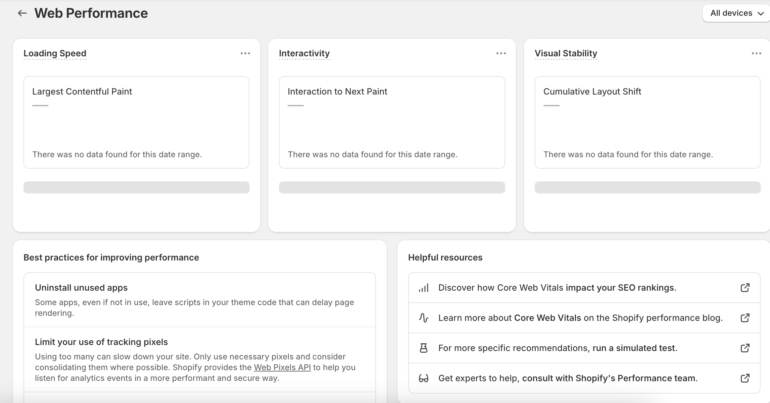
Improving site speed can directly impact your search rankings and conversion rates.
If you’re using Shopify Plus, you’ll unlock deeper analytics, custom reports, and access to automation tools like Shopify Flow — perfect for managing high-volume sales or B2B customer segments.
Related: Shopify vs Shopify Plus (2025): Is It Worth Upgrading?
💡 Tip: Check your analytics at least once a week and after running any major campaign. Use what you learn to test new ideas and double down on what’s working.
With this final step, you’ve got the tools and know-how to not only launch your store, but also to build, market, and scale it like a pro.
FAQs About Starting a Shopify Store
How much does it cost to start a Shopify store?
Setting up a Shopify store typically costs between $300 and $600 upfront, which includes your Shopify subscription and optional add-ons like apps or premium themes. Expect monthly expenses to start around $75 to $150, depending on the features you use. If you plan to sell in person, you’ll also need to budget for hardware costs ranging from $49 to $499, plus $89 per month, per location for Shopify POS Pro.
Is Shopify worth it for beginners?
Absolutely. It’s beginner-friendly, and the interface is intuitive. Plus, the built-in tools help you with shipping, taxes, payments, and more — no coding needed.
How much does Shopify take from a $100 sale?
If you use Shopify Payments, the fee is about 2.9% + 30¢ per transaction on the Basic plan. So for a $100 sale, Shopify takes roughly $3.20.
Is setting up a store on Shopify free?
You can make a Shopify store with a free trial. After that, you’ll need to subscribe to a plan to continue selling.
How much does Shopify charge per item sold?
There are no per-item fees, but transaction fees apply. If you sell 10 items in one order for $100 total, you still pay the flat percentage on the full sale, not per item.
How long does it take to set up a Shopify store?
You can technically get your store up in a few hours, but expect to spend a few days fine-tuning your branding, listings, and settings.
Are there any legal requirements for setting up a Shopify store?
Yes, depending on where you operate. Common requirements include registering your business, setting up sales tax collection, and including a privacy policy and terms of service on your site. Shopify has templates to help with those, but it’s smart to consult a local advisor.


: Is It Worth Upgrading?")


